
Tutorial | How to make a clipping path in Adobe Photoshop?
Do you want to know Know how to make a clipping path in Adobe Photoshop? The clipping path service is necessary when you want to move the photo or image object (e.g., background). And when you want to keep the contents of that file for use in another background. Doing the clipping path around the subject (e.g., an image) and getting rid of the background is not a very complicated task for most Photoshop experts.
However, the Path of perfect clipping is a matter of practicing Photoshop’s pen tool. So, we say the more you practice the pen tool, the more you can improve the clipping path task’s accuracy. Know how to make a clipping path in Adobe Photoshop?
This clipping path tutorial will help you understand the primary method of how to do the clipping path in Photoshop? All Photoshop versions have almost the same functionality so that you can use the Photoshop version).
I hope you have Photoshop software installed on your computer. If not, download and install the Photoshop software. Once the Photoshop software is gone, open the image clipping path you want.
Open a file on the photoshop software.
Opening a file is a similar process to other software. Click the File menu and select Open. You will get a dialogue box. Now, you need to choose the image you want to open. Alternatively, you can drag the file directly into the Photoshop software. Know how to make a clipping path in Adobe Photoshop?
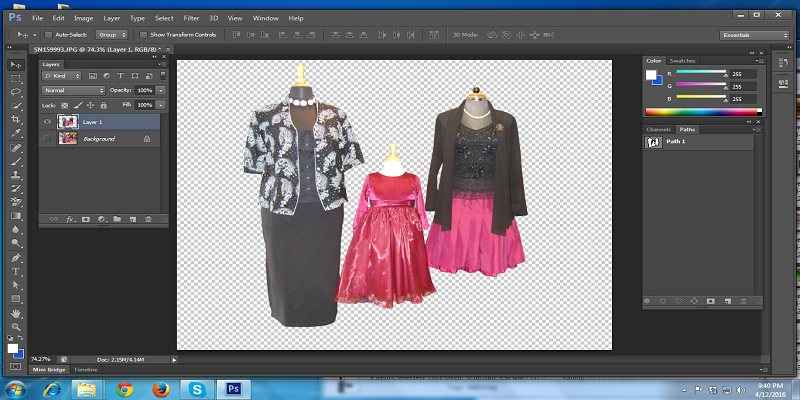
Click the open file, and the image will appear in Photoshop. If your computer system has less RAM or the file size is more than 1 GB, it will a few time to load the Photoshop file. From our experience, the Photoshop CS version requires at least 2GB of RAM, so make sure you have enough space before opening any large files. Due to insufficient configuration, a file may not be opened in Photoshop or saved after the clipping path.
Now, go to Paths in the window menu. A path level window will pop up. Keep the Path Level window visible to the monitor’s right so you can see the clipping paths working there. Know how to make a clipping path in Adobe Photoshop?
By the software default, you will see a toolbox on the left. Or you can select Toolboxes in Tools from the Window menu. Now you need to click on the pen tool from the toolkit option. With the mouse pointer, you will feel like a pen after selecting the pen tool. If not, you need to consider the above pen tool selection method.
OK, you can now draw a path around the edge of the image you have selected. An anchor point will be created while clicking on the image brink. From there, you click the other adjacent feature and continue drawing until the path image rises to the first point and is adding to it. Know how to make a clipping path in Adobe Photoshop?
Now select the Path Layers window and create a work path on the clipping path. If you double click on the patch level, a small window will appear as Save Path and Name Path help. Finally, click on the OK button and save the file as on the original Path.
Magical ways to create a transparent background for an image
- Magical ways to create a transparent background for an image
- The magical way through the Photo Frame editing toolkit
- The magical way through Photoshop software
- The magical way through Mac
- Clipping Path Specialist – Your outsourced image-editing solution
Everyone needs to know how to edit an image. Everyone has a business background. No one is perfect, and some people don’t even have time to draw pictures on their busy schedule. Whenever you ask a professional to edit a photo, be prepared to pay them if you don’t know. Yet, nowadays, it is essential to look at the editing of images.
There are lots of image editing tools that can create magic in your pictures. So, if you run into problems with an app, don’t worry. You have multiple apps that can push your editing skills to a higher level. Know how to make a clipping path in Adobe Photoshop?
The magical way through the Photo Frame editing toolkit
Photo fire has many features that make it one of the top list of photo editing applications. You need to click the “Photo Cutter” feature to create a transparent background or replace your image’s existing knowledge.
Click the “Open” button to find the image you want to take action on. For other processes, click the “Remove Paint Areas” tool. The tool will help you quickly identify the places you want to create transparency. After you finish editing, click the Save button. Know how to make a clipping path in Adobe Photoshop?
The magical way through Photoshop software
Photoshop is the best software in the world is resizing, cropping, or adding effects. Yes, you heard, right. It is Photoshop, and it is First and utmost, there is an option to choose the image you want to edit, then click “Lasso Tool” or “Magic Vand Tool” or “Quick Selection Tool.” Now move the cursor to the area you want to create transparency.
You need to reduce the brush’s size and zoom in on your vision for a more subtle-tuned image. Now in the remaining background, you need to click on your keyboard: “Shift + Control + I.” To view, click “Refine Edge,” then click “Smart Radius” to give a more realistic and smooth look.
If you want to remove extra colours, decorations, click “Continue Colors.” It will help if you tap the “Output section” -> “New layer with layer mask” option. Finally, be sure to save the file in PNG format.
The magical way through Mac
Mac users have a great way to experience the user. We all know that working on a mac is as smooth as butter. And one thing is common for Mac users and its “preview” tools. Mac users will be able to read it if they look for more features, and Windows users will be able to learn the knowledge on their choice.
If you are a Mac user, you should not wait a second for the preview software to open. This software will provide you with excellent clarity or background removal editing techniques to apply to your images.
First of all, you can select the image you want to edit, open it with “Open with an option,” and then click on “Preview.” Now click on “Markup Toolbar” to create background clarity in your image. Tap “Show Markup Toolbar,” then -> “Click the Instant Alpha option.”
With the “marching ants” line, you can mark your selection to create transparency. After that, you need to delete the selected region. Now click on the save option and convert it to PNG format.
Clipping Path Specialist – Your outsourced image-editing solution
We are working in the graphic design industry for the last five years. We only provide our services in our country, but now we are providing our services worldwide. Clipping Path Specialists provide excellent and top-notch image editing services.
So it gained a significant reputation all over the world. Our services include deep etching services, image editing services, and other creative work. We are committed to providing you with high-quality editing work.
Today, Clipping Path Service Specialists provide a list of services. Paint from hand-drawn deep etching service to vector conversion service. We use hundreds of clipping path specialists and operate in three countries. Believe in training and recruiting those who need it the most. Our success is our commitment not only to the local population but also to our customers.
jonathan campbell
Content writer and guest posting service provider!!